Onboarding Video Scripts: Templates + Guide
TL;DR
- A strong onboarding video script follows a tight structure: hook → expectation-setting → core action → single next step.
- Three templates covered: welcome video (~90 sec), feature walkthrough (~2–3 min), and how-to tutorial (~3–5 min).
- Keep narration at ~130 words per minute for instructional content — slower than typical marketing copy.
- The biggest script killers: trying to cover too much, writing for reading instead of listening, and missing the "what to do next" close.
- If your team is writing and editing these videos in-house, budget 2–4 hours of editing per finished minute of onboarding video.
Table of Contents
- Why Your Script Is the Highest-Leverage Part of Onboarding Video
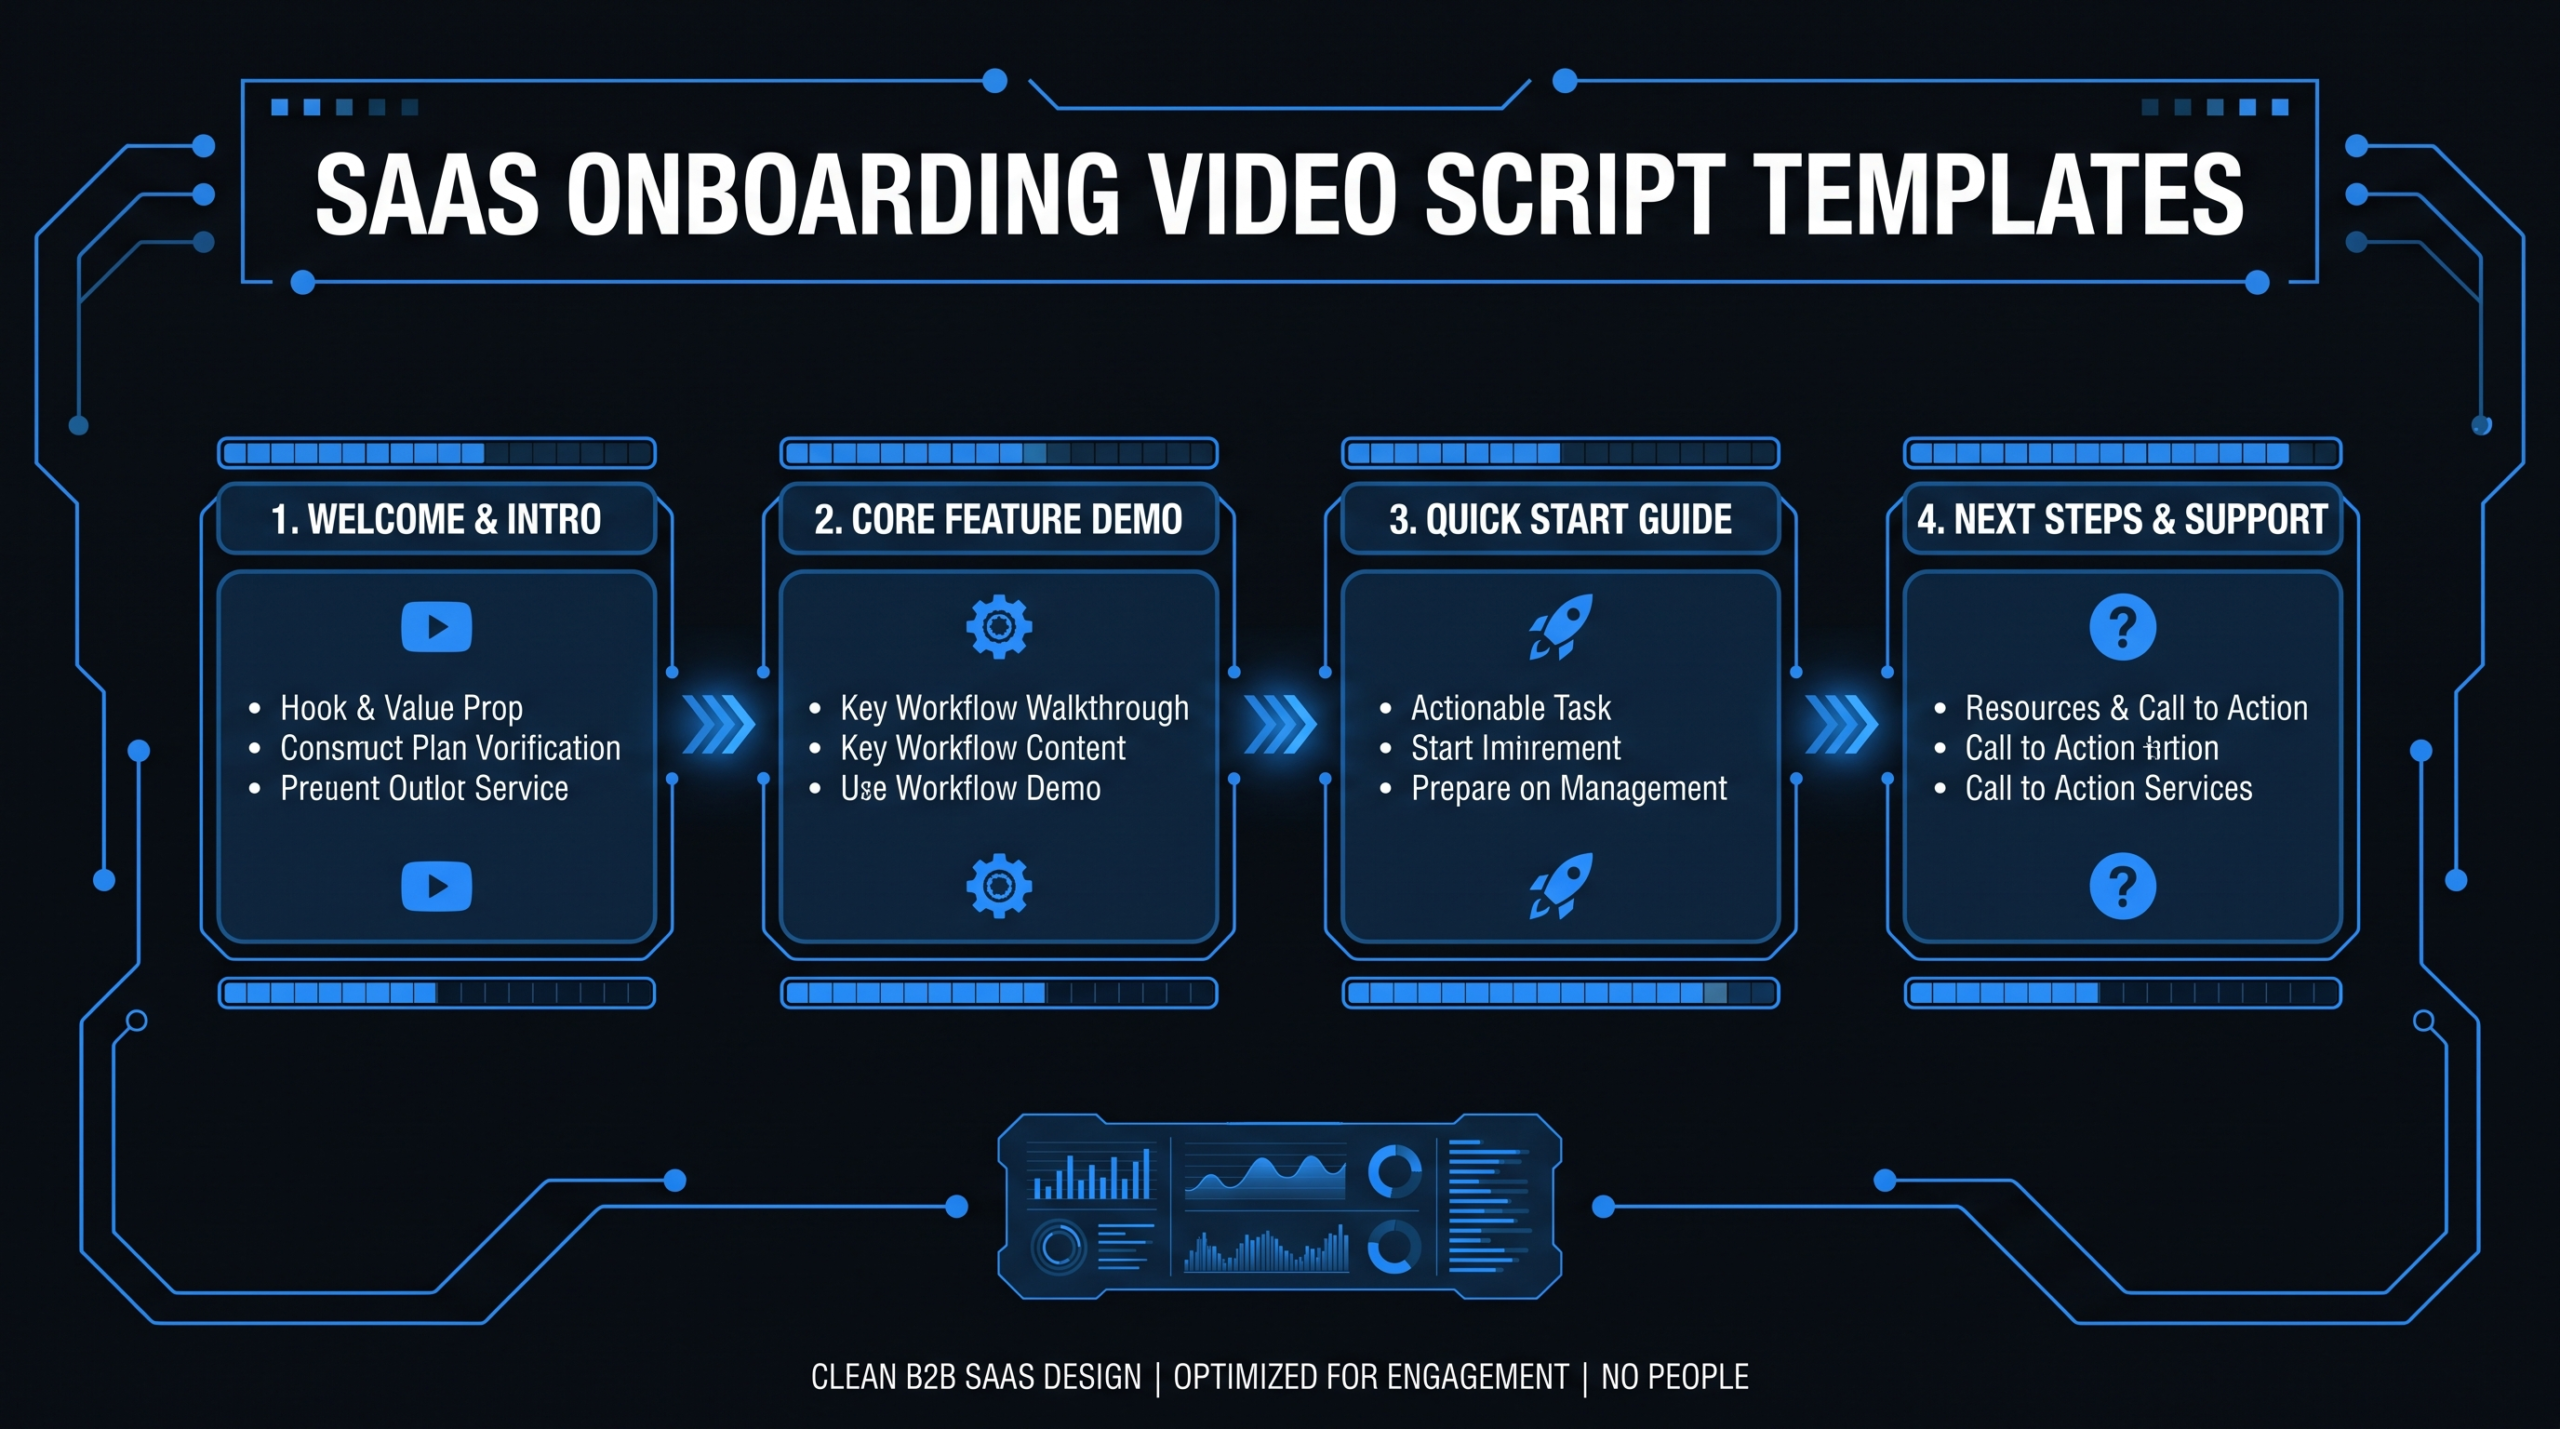
- The 4 Types of Onboarding Video Scripts
- Template 1: Welcome Video Script (~90 Seconds)
- Template 2: Feature Walkthrough Script (~2–3 Minutes)
- Template 3: How-to Tutorial Script (~3–5 Minutes)
- How to Write an Onboarding Video Script: 6-Step Process
- Script Length and Pacing Guidelines
- 7 Onboarding Script Mistakes That Hurt Completion Rates
- FAQ
Most SaaS onboarding videos underperform not because of poor editing or camera quality — they underperform because the script was written in a hurry by someone who understood the product too well to explain it clearly.
A well-structured onboarding video script forces clarity before production starts. It determines how long the video runs, what the viewer actually does after watching, and whether the content can be updated 12 months from now without a full reshoot. This guide gives you three ready-to-use onboarding video script templates plus a repeatable process for writing scripts your whole team can execute consistently.
Why Your Script Is the Highest-Leverage Part of Onboarding Video
The script determines everything downstream. A weak script produces a confusing video regardless of production quality; a strong script makes even a screen-recorded walkthrough effective at driving activation.
The core problem with most SaaS onboarding video scripts is the curse of knowledge: the person writing the script knows the product so well that they skip the cognitive steps a new user needs. They start with features instead of outcomes. They assume context the viewer doesn't have. They leave the viewer with a vague "explore the dashboard" close instead of a single specific action.
Video platforms like Wistia consistently note in their video benchmark research that shorter, tightly structured videos retain viewers far longer than longer, loosely structured ones — and onboarding video is especially sensitive to this because viewers are making a real-time decision about whether the product is worth their effort to learn.
Scripts also solve the update problem. When a feature changes, a script-first workflow means you can assess exactly what lines need to change before anyone picks up a recording tool. No script means a full re-watch of existing video to figure out what's outdated, then a guess at what was said, then a re-record with inconsistent pacing.
The good news: onboarding video scripts follow predictable structures. Once you have a template for each video type, writing becomes faster and the output becomes more consistent — whether it's being written by a product manager, a content marketer, or a dedicated scriptwriter.
The 4 Types of Onboarding Video Scripts
Each type of onboarding video serves a distinct activation goal and requires a different script structure. Choosing the right type before writing prevents the most common mistake: trying to cover too much in one video.
Onboarding Video Types vs. Script Requirements
| Video Type | Goal | Ideal Length | Script Focus |
|---|---|---|---|
| Welcome Video | Reduce anxiety, set expectations, drive first action | 60–120 seconds | Outcome promise + single first step |
| Feature Walkthrough | Show a specific feature's value and how to use it | 90–180 seconds | Why it matters + step-by-step use |
| How-to Tutorial | Complete a specific task from start to finish | 3–5 minutes | Problem → steps → outcome confirmation |
| Troubleshooting / FAQ | Resolve a common support question without a ticket | 60–90 seconds | State the problem, solve it directly, confirm resolution |
Most SaaS products need at least the first three types. The troubleshooting video is high-leverage for support ticket deflection but often deprioritized until the support team flags the same question appearing repeatedly. When building an onboarding video library, start with welcome → feature walkthroughs for your top 3–5 features → tutorials for your most common user tasks, in that order.
For teams scaling their video output beyond what in-house resources can handle, our guide on onboarding video production for SaaS covers the full production workflow, team structures, and what to outsource vs. keep internal.
Template 1: Welcome Video Script (~90 Seconds)
The welcome video is the highest-stakes onboarding video you'll make — it's the first impression after signup and the best opportunity to anchor the user to a specific first action. Keep it under 2 minutes. Every sentence should be necessary.
Structure
- Opening hook (5–10 sec): Acknowledge where the user is — just signed up — and immediately frame the outcome, not the feature.
- Expectation-setting (10–15 sec): Tell them what they'll be able to do after watching.
- First action (40–50 sec): Walk them through the single most important first step. Not three steps. One.
- Close with next step (10–15 sec): Name the exact next thing they should do and where to find it.
Script note: Replace "[SPECIFIC OUTCOME]" with something the user actually cares about — not a feature name, but a result they want. "Have your first report live" beats "complete the dashboard setup."
Template 2: Feature Walkthrough Script (~2–3 Minutes)
Feature walkthroughs work best when they lead with the "why" before the "how." Users who don't understand why a feature matters will abandon the video as soon as it starts to feel like instruction for instruction's sake. Open with the benefit, then earn the step-by-step.
Structure
- Feature + benefit (15 sec): Name the feature and its direct, specific benefit. Skip the marketing language.
- When to use it (15 sec): Give a concrete scenario where this feature saves time, reduces errors, or unlocks something important.
- Step-by-step narration (60–90 sec): Walk through each step with simultaneous screen recording. Number the steps aloud.
- Pro tip (15–20 sec): One piece of non-obvious information that makes the feature more useful.
- Next step (10 sec): Where does the user go after using this feature?
Template 3: How-to Tutorial Script (~3–5 Minutes)
Tutorial scripts are the most complex to write because they need to cover a complete task — from problem to resolution — while staying tight enough that viewers don't drop off halfway through. The key structural move is to state the end state at the beginning so viewers know what they're working toward.
Structure
- Problem statement (15 sec): Describe the situation the viewer is in. This is what makes them feel seen.
- Outcome promise (10 sec): State exactly what they'll be able to do by the end.
- Prerequisites (15 sec): Tell them what they need in place before they start. Critical for avoiding mid-tutorial drop-off.
- Step-by-step process (2–3 min): Numbered steps, each with narration and simultaneous screen action.
- Outcome confirmation (15 sec): Confirm what success looks like so the viewer knows they've completed the task correctly.
- Next step (10 sec): One action only.
How to Write an Onboarding Video Script: 6-Step Process
Good onboarding video scripts aren't written in a single sitting — they're built through a series of deliberate steps that move from user context to finished narration. This process works whether you're writing the script yourself or handing the brief to a dedicated scriptwriter.
Step 1: Define the single activation goal
Before writing a word, answer this: what is the one action you want the viewer to take during or immediately after this video? Not "understand the feature." A specific action: "connect their first data source," "invite a teammate," "publish their first campaign." If you can't name one action, you don't have a script concept — you have a product tour, which is a different thing and usually less effective.
Step 2: Map the minimum viable path
List every step a user has to take to complete the activation goal. Then cut anything that isn't strictly necessary for this video. Intermediate users can handle branching paths; onboarding video viewers cannot. If the process has more than 6–7 steps, split it into two videos and script a clear handoff between them.
Step 3: Write the hook before anything else
The first 10 seconds determines whether the viewer stays. Write the hook last in terms of refinement, but write it first in terms of order. It should name the outcome the viewer gets, not the feature they'll learn. "In the next 2 minutes, you'll have your first report live and shareable" beats "In this video, we're going to look at the Reports module."
Step 4: Write narration in spoken language
Read every line aloud as you write. If it sounds like documentation, rewrite it. Common signals that copy is written for reading, not listening: passive voice, jargon-dense sentences over 20 words, any sentence that would need to be re-read to understand. Narration should sound like a knowledgeable colleague explaining something across a desk, not a product manual.
Step 5: Add production direction
Every narration line that references a UI element should have a corresponding screen direction in brackets — what's shown, what's highlighted, what the cursor does. This is what separates a scriptwriter from an editor's brief. When your video editor or production team picks up the script, these directions remove all ambiguity about what happens on screen at each moment. For a full overview of how SaaS companies structure their video production workflow, see our SaaS video production guide.
Step 6: Read the finished script aloud and time it
Read at the pace you'd deliver it on camera — slower than you think, around 120–140 words per minute for instructional content. If you're over your target length by more than 20%, cut rather than speed up. Faster delivery doesn't save time for the viewer; it increases cognitive load and drop-off.
For teams producing onboarding video content at volume, this scripting process is where Video Editing Company typically recommends investing before optimizing anything else. A library of 20 scripts that are consistently structured and voice-approved is far more scalable than 5 videos that had to be re-recorded because the script was written the same day as the shoot. See our plans and pricing for how we structure ongoing video editing support for SaaS content teams.
Script Length and Pacing Guidelines
Script length directly controls video length, which is the single biggest factor in viewer completion rates. Write to the appropriate word count for your video type, then pace the narration to match. The targets below are based on instructional delivery — slower than marketing video, where pacing is typically 150–170 words per minute.
Onboarding Video Script Length Reference
| Video Type | Target Length | Word Count at 130 wpm | Max Steps/Sections |
|---|---|---|---|
| Welcome video | 60–120 sec | 130–260 words | 3 (hook, action, next step) |
| Feature walkthrough | 90–180 sec | 195–390 words | 5 (why, when, steps, tip, next) |
| How-to tutorial | 3–5 min | 390–650 words | 6–7 steps, then split |
| Troubleshooting video | 60–90 sec | 130–195 words | Problem → fix → confirm |
Pacing principles for instructional narration
- 130 words per minute is the instructional target. This gives viewers time to follow along with the screen action while processing the narration. Marketing copy reads well at 150–160 wpm; instructional video at that pace is too fast for most screen-based tasks.
- Build pauses into the script, not the recording. Write "[pause 2 seconds]" at key transition moments — after navigating to a new screen, after completing a step, before the close. These pauses are editorial decisions, not accidents.
- Short sentences beat complex ones for on-camera delivery. Sentences under 15 words are easier to deliver naturally and easier for viewers to process. When you have a complex idea to convey, break it into two sentences.
- Don't read the UI. If the button says "Export" and you're clicking it, don't say "click the Export button." Say "click Export" — saving 30% of the words in step narration adds up across a 10-step tutorial.
HubSpot's video marketing research consistently highlights that shorter, purpose-built videos outperform long omnibus tutorials in engagement and action rates — the principle applies directly to onboarding video length decisions.
When to split instead of condense
If your how-to tutorial script runs beyond 650 words (5 minutes at 130 wpm), split it before cutting content. A 7-minute tutorial with a 50% drop-off rate helps half your users. Two 3.5-minute tutorials, each with 80% completion, helps 80% of users with the full process and 60% with the second half — a net gain. Design your onboarding video library as a series with numbered episodes from the start, so splitting is always a viable decision.
7 Onboarding Script Mistakes That Hurt Completion Rates
These are the patterns that show up repeatedly when onboarding video scripts are written without a structured process. Most are fixable at the script stage at zero cost — they become expensive to fix after production.
1. Trying to cover everything in one video
The most common mistake. The product team wants to cover setup, core features, advanced settings, and tips — all in one video. The result is a 12-minute walkthrough that loses 70% of viewers in the first 3 minutes. Ruthlessly scope each video to a single activation goal. Everything else gets its own video.
2. Writing feature-first instead of outcome-first
Scripts that open with "In this video, we'll look at the Analytics module" tell the viewer what they'll learn — not why they should care. Reframe every opening to the outcome: "By the end of this video, you'll know exactly which campaigns are driving your highest-value conversions." The viewer decides to keep watching based on the outcome, not the feature name.
3. Using product jargon without definition
Internal terminology feels natural to your team and is invisible to new users. Terms like "workspace," "pipeline," "entity," or "node" mean different things in different products — and a new user hearing your specific definition for the first time while also trying to follow screen instructions will drop off. Define any term that appears for the first time in onboarding video with a single explanatory sentence.
4. Forgetting production direction
A narration script without screen directions forces the editor or screencast recorder to make real-time decisions about what to show and when. Those decisions are rarely optimal. Every narration line that references a UI element needs a corresponding direction in the script: [screen: show the left sidebar], [highlight the blue Export button], [zoom in on the date field]. This is especially important if you're outsourcing your video editing to a team that doesn't use your product daily.
5. No explicit close
Onboarding videos that trail off — "and that's all there is to it, thanks for watching" — miss the highest-value moment in the video. The last 10–15 seconds should always name the exact next action and where to find it. "Your next step is connecting your first integration. You'll find it in the Settings menu — video two covers exactly how to do that." This is how you chain individual videos into a completion-driving sequence.
6. Writing for reading speed instead of listening speed
Narration is processed aurally in real time while the viewer's eyes are on the screen. Long complex sentences that read well on paper are cognitively expensive when heard while simultaneously watching UI movements. Apply the 15-word-sentence rule during the final script pass: flag any sentence over 15 words and break it in two.
7. Skipping the approval round before recording
A script review takes 15–30 minutes. A re-record of a video because the approved messaging changed after filming takes 2–4 hours plus editing time. Get the script approved by product, marketing, and whoever owns onboarding messaging before any screen recording begins. The script is cheap to change; the video is not.
Frequently Asked Questions
How long should an onboarding video script be?
For instructional onboarding video delivered at ~130 words per minute, target 130–260 words for a 60–120 second welcome video, 195–390 words for a 2–3 minute feature walkthrough, and 390–650 words for a 3–5 minute how-to tutorial. If a tutorial script exceeds 650 words, split it into two videos rather than condensing — shorter completion rates on two focused videos typically outperform a single longer one with significant drop-off.
Should I write the script or use AI to generate it?
AI tools can accelerate onboarding script drafts, but they consistently miss two things: product-specific accuracy and the specific close (the "your next step is…" moment that chains videos into a sequence). Use AI to generate a structure and first draft, then rewrite every step to match your actual UI, your actual nomenclature, and your specific activation path. The review and rewrite typically takes 20–40% of the time it would take to write from scratch — net positive, but not a full replacement for human knowledge of the product.
How many onboarding videos does a typical SaaS product need?
Most SaaS products benefit from a library of 10–25 onboarding videos. A practical starting set: 1 welcome video, 3–5 feature walkthroughs covering the core activation path, 3–5 how-to tutorials for the most common early tasks, and 2–3 troubleshooting videos for the questions support fields most frequently. That's 9–14 videos. Build from there based on where users are getting stuck — support ticket volume and in-app drop-off data are the best signals for prioritization.
What's the best format for an onboarding video script document?
Use a two-column format: narration on the right, production direction on the left. This makes the script readable as a document and actionable as a production brief simultaneously. Include a header block with video title, target length, audience segment (new user, returning user, admin), and approval status. Store scripts in a shared location — not email attachments — so editors, product reviewers, and voice talent all work from the same source of truth.
How often should onboarding video scripts be updated?
Update scripts when the UI changes meaningfully (navigation, button names, flow), when pricing or plan availability changes, or when activation data shows the video's target action is no longer performing. Avoid cosmetic updates — re-recording because the design updated minor visual elements but the steps are identical is usually not worth the production cost unless you have a high-volume, low-cost editing arrangement. A practical rule: review your top 5 onboarding videos every quarter against current UI. Script updates take 30–60 minutes; re-records take a day of editing per video. Catching a drift early keeps costs manageable.
Need Help Editing Your Onboarding Videos?
Video Editing Company works with B2B SaaS teams to edit, polish, and deliver onboarding video content at scale — from single tutorial edits to ongoing monthly video programs. Our dedicated editor teams learn your product and brand, so every video maintains the same quality and style without a brief-from-scratch every time.
Book a Free Strategy Call See Plans & Pricing